
Do you want to take up knitting in your free time, whether you are new to it or hoping to improve your skills? In either case, you have landed on the right guide.
In the last couple of years, knitting has become quite the rave as people are readily realizing how therapeutic this activity is in this world full of stress. It also gives a person a sense of having accomplished something, as well as being productive. In addition, you can also feel the joy of having created a beautiful piece of art with your own hands.
Getting Started
Initially, the process may seem a little daunting and complex. However, soon enough, you will be able to put together some of the most complicated patterns you have ever seen. In no time, you will spend hours, weeks, and even months on this therapeutic activity.
Knitting can be made easy and done right, only if you are a little disciplined and if one is headed in the right direction. This is where this extensive guide comes into play. Continue reading to learn a bit about starting off knitting with some needles and yarn.
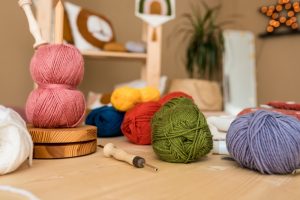
1. Yarn
The pattern is one of the most important parts of knitting. However, you cannot create a pattern without picking out the yarn first, which defines the creativity and outcome of your project. Your abilities as a knitter play a significant role as well but, yarn is what makes the real difference.
There are a number of fibers with varying properties, and each is suitable for a specific kind of project. Commonly used yarns include cotton, acrylic, cashmere, wool, alpaca, silk, and a combination of any of these two fibers. You can also choose from a large variety of other fibers, such as angora and bamboo.
As aforementioned, these fibers all have different properties, which make them behave differently once you have placed them on your needle. Their features distinguish them from others and allow them to enhance whatever it is that you are working on. For example, given that wool is an excellent insulator, it is often used to knit sweaters for the winter season. On the other hand, cotton makes for a great dishcloth, on account of how absorbent it is.
Another aspect of yarn is its weight, which includes materials used to knit super bulky items, such as thick blankets and rugs, or a super-fine yarn used to make lace items. Lastly, the color of the yarn is dependent upon your personal preference. Whatever you choose for your project will define its outcome.
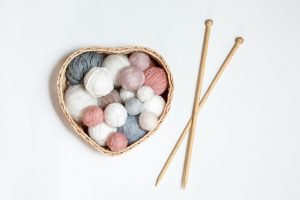
2. Knitting needles
Just like it is with yarns, knitting needles also vary with respect to their materials. There are those made out of bamboo and wood, whereas there are conventional ones made out of aluminum. In addition, needles have distinct forms as well, such as circular and straight. There is also a type of needle known as a cable needle, which helps you make more intricate designs when knitting.
A simple search online into knitting needles will also bring you to their various sizes. Before you can sit down to work on your project, you will also need to match the weight of your preferred yarn with that of the size of the needle. This has the ability to make or break the efficiency and creativity you are putting into your project.
3. Different accessories for knitting
In addition to yarn and knitting needles, there are various accessories that you will need for your project. These include tape measures, tapestry needles, crochet hooks, stitch counters, gauge checkers, stitch markers, as well as scissors.
Recommendations For Beginners
Given that you are a beginner, you will want to start off with a wool or acrylic blend yarn. It is not too heavy or too light and will provide you with balance in the first go. As you get into the practice of knitting, this type of yarn will be perfect when it comes to helping you master a couple of techniques.
With the yarn taken care of, you will have to choose a knitting needle. Wooden and bamboo needles are typically chosen by beginners, as the metal ones are slippery. This could potentially cause you to injure yourself as well, which is why it is better to play it safe from the beginning.

Despite the fact that this is your first time, you will still need a handful of accessories, such as measuring tape, scissors, and a tapestry needle. The others, as aforementioned, can also be helpful, but this combination is just right to get you started.
Make a list of all these accessories, and then head down to a local store that sells knitting materials. Personally, take the yarn into your hands and get a feel of it. If you have any questions, do not be afraid to ask the professionals working there. You can also find easy starter kits for knitting, which come with their own set of instructions for a hat, a dishcloth, or scarf.
Tying a Slipknot
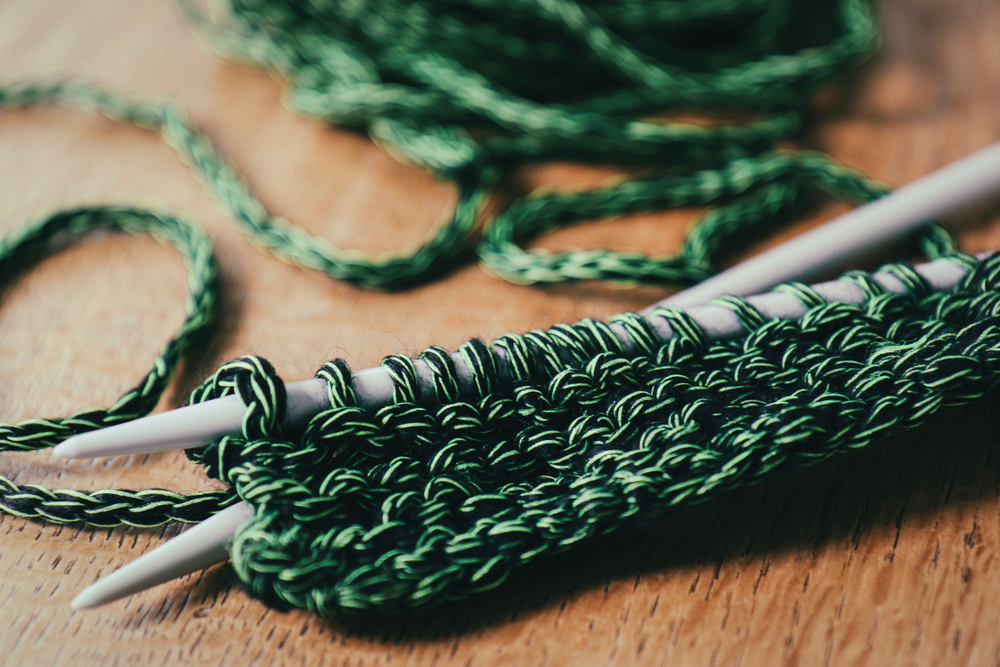
With your yarn, knitting needles, and all the necessary accessories, you are ready to start knitting. The first thing you need to do is make a slipknot. Generally, knitting and knots are not related. However, this kind of knot is not only common but preferred to help you along for the first time around.
Sailing, knitting, and rock climbing are all distinct activities, but they all have a slipknot in common. This is because it is a useful knot in a wide array of fields, most likely because it can easily be loosened and moved along the length of the yarn. You can also unwind it simply by pulling at one of the ends of the yarn. Below are some steps which will teach you how to tie this handy knot.
1. The first thing that you need to do is get some yarn before you can start off.
2. Next, take one end of your chosen yarn and separate at least 10 inches to a maximum of 12 inches. This is roughly around 25 to 30 cm. Once this is done, twist or fold the yarn from the middle of the piece to form a loop.
3. With your left hand on the edge of the loop, place the forefinger and thumb of your right hand into the loop.
4. Ensuring that the loop is still on your forefinger and thumb, take the working yarn into your hand. Once it is secure, take it all the way through the loop you originally formed.
5. There should be two loops in your hand now. One is the original and the other one that you just brought all the way through.
6. With the new loop in your right hand, use your left hand to reach out for the edges of the loop you originally formed. Pull it gently and watch as it tightens its grip around the other loop, and voila! A slipknot has been formed.
7. But your work is not yet done. You need to pick up a needle with your dominant hand and transfer the slipknot of your creation onto the knitting needle. Then you need to pull on the yarn in order to ensure that the knot is firm and tight. Remember, it should be strong enough to not slip off while you work and not loose enough to not be able to move freely.
You can now start stitching. But first, it is time to learn how to cast on all the stitches that your project will further require.
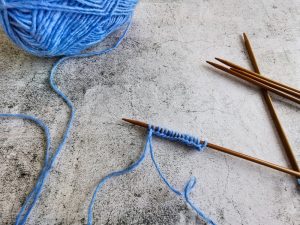
Casting-on
Before you can actually start knitting, you have to have a foundation. This will come from your left needle, which is known as casting-on in the language of knitting.
There are a couple of methods that you can use to cast-on. These include the single cast-on, which is considered to be the easiest method. This type of casting-on is sometimes also known as the backward loop or thumb cast-on. The reasons behind its various names will eventually become clear once you start practicing your knitting.
A single cast-on is known for creating a loose and fine edge for whatever it is that you are knitting. It is usually known to work especially well when you are putting in lace stitches. Moreover, whenever you start off making patterns in your knitting project, they will require you to first cast on. You may even have to cast on while you are in the midst of creating a wonderful pattern. This is where the single cast-on will come in, as it is easy and quick to make.
Here are the steps you can follow in order to master the process of casting-on.
1. Hold a knitting needle in your dominant hand and then gently transfer the slipknot onto it. Once it is in position, pull on the yarn to keep it firm and tightened. As aforementioned, the knot should be just right so that it stays in place and does not hinder your work by falling off or remaining immobile.
2. Next, make a loose fist out of your palm and fingers to keep the working yarn in place. Once again, pull on the yarn and make sure that it is only slightly taught. Then you can put your thumb right above the top end of the yarn.
3. Rotate your hand slightly so that your thumb moves right around the yarn, through its back, and straight in your direction. You will realize that it is now wrapped around your hand, specifically your thumb.
4. Making sure that your thumb is currently standing upright, hold the knitting needle with your dominant hand in order to slide it through your thumb’s base and the yarn itself. When this happens, your needle will have moved upwards, right alongside your other hand.
5. Bring your thumb back down, straight outside the loop you formed, and slide it onto the needle. Once again, pull on the edges of the yarn to keep it firm.
6. There should now be an additional loop present on your handle along with the formerly created slipknot. Carry on with the process of casting on until you are happy with the stitches you have.
Helpful Tips For Knitting
Below are some helpful tips that can help you as you learn how to knit like a pro.
1. Begin by making a swatch
Now that you know all the basics of stitching, you must have a scarf in mind that you want to knit. However, it would be best if you stopped right here. Rather than starting off with a complicated scarf, how about you first make a swatch? This means that you will start off with practicing a small square in order to get the hang of the entire thing.
2. Watch videos for reference
Videos will give you excellent visuals when it comes to the process of knitting. This particular craft is motion-based, which means that pictures will not be as helpful, nor will most instructions. Watching videos will allow you to distinguish between different hand movements.
3. Master the knit stitch first
Experts advise that until and unless you can create a knit stitch with a blindfold over your eyes, you should not proceed towards other methods, such as the pearl stitch. This is because you will not want to confuse yourself with the more complicated techniques before you have mastered the simpler ones. Otherwise, you may end up getting frustrated and abandoning the activity altogether.
Knitting is a relaxing, practical, and fun hobby. It may seem a little lengthy and intimidating in the beginning but, it is an important skill, as well as an intricate form of art. Though this is just a guide for beginners, you will soon be able to learn all of its techniques and whip up complex patterns. You can easily start off with first knitting a small square to practice your hand, and then eventually create scarves, dishcloths, and numerous other things for yourself, as well as your loved ones!


